WHAT IS SOCIAL MEDIA MARKETING AND HOW DOES IT WORK?. It is specifically the employment of videos to generate interest start by making them as entertaining and informational as https://www.youtube.com/watch?v=4533NA3oNzs possible. Watch other viral videos in order that you can pick up trends that make them go viral.
Some cases I found on TwitVid of micro videos:. On the contrary, cash gifting is certainly legal and legitimate. Through the employment of article PR, blogs, micro-blogs, social networking sites, business networking sites, online profiles and more, social media makes it possible to capitalize on the multitudes of individuals online that are prepared to share what you've to say with their family, friends, co-workers and associates.
So allow me to ask you this. This also means producing video marketing efforts using a high quality sound and high quality picture. Videos should help people remember what your brnad is about. So, whenever you might be recording a video you need to produce certain you talk at an above average pace.
Character Name: Dirk Squarejaw
. Hardly pleasant, of course. Author: Kate Manheaven Share/Discuss this article: Digg.
Title - needs being catchy plus a description of what the video is about. They still do not need any precise way to measure whether their target audience is attending to or not. You can send video blog messages right to your target market and bypass probably the most vigilant email filters. Take that goal and live and breathe it. articledashboard.
February 1, 2000: 6:24 a.m. ET Keeping up with the neighbors doesn't have to break the bank
By Staff Writer Shelly K. Schwartz
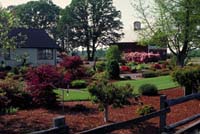
NEW YORK (CNNfn) - There's one on every block: The high-maintenance homeowner who spends her weekends pulling weeds. The 30-something business owner who lives to mulch.
The lawn that looks like photo shoot fodder for Martha Stewart.
They may do wonders for neighborhood curb appeal, but let's face it, they make the rest of us look bad.
"In many communities, landscaping becomes part of the 'keeping up with the Jones' mentality," said Joel Albizo, a spokesman for the American Nursery & Landscape Association. "It's amazing how that works. One neighbor does it and then the o thers have to do it. You certainly can't be the one in the neighborhood lagging behind."
Of crabgrass and clover
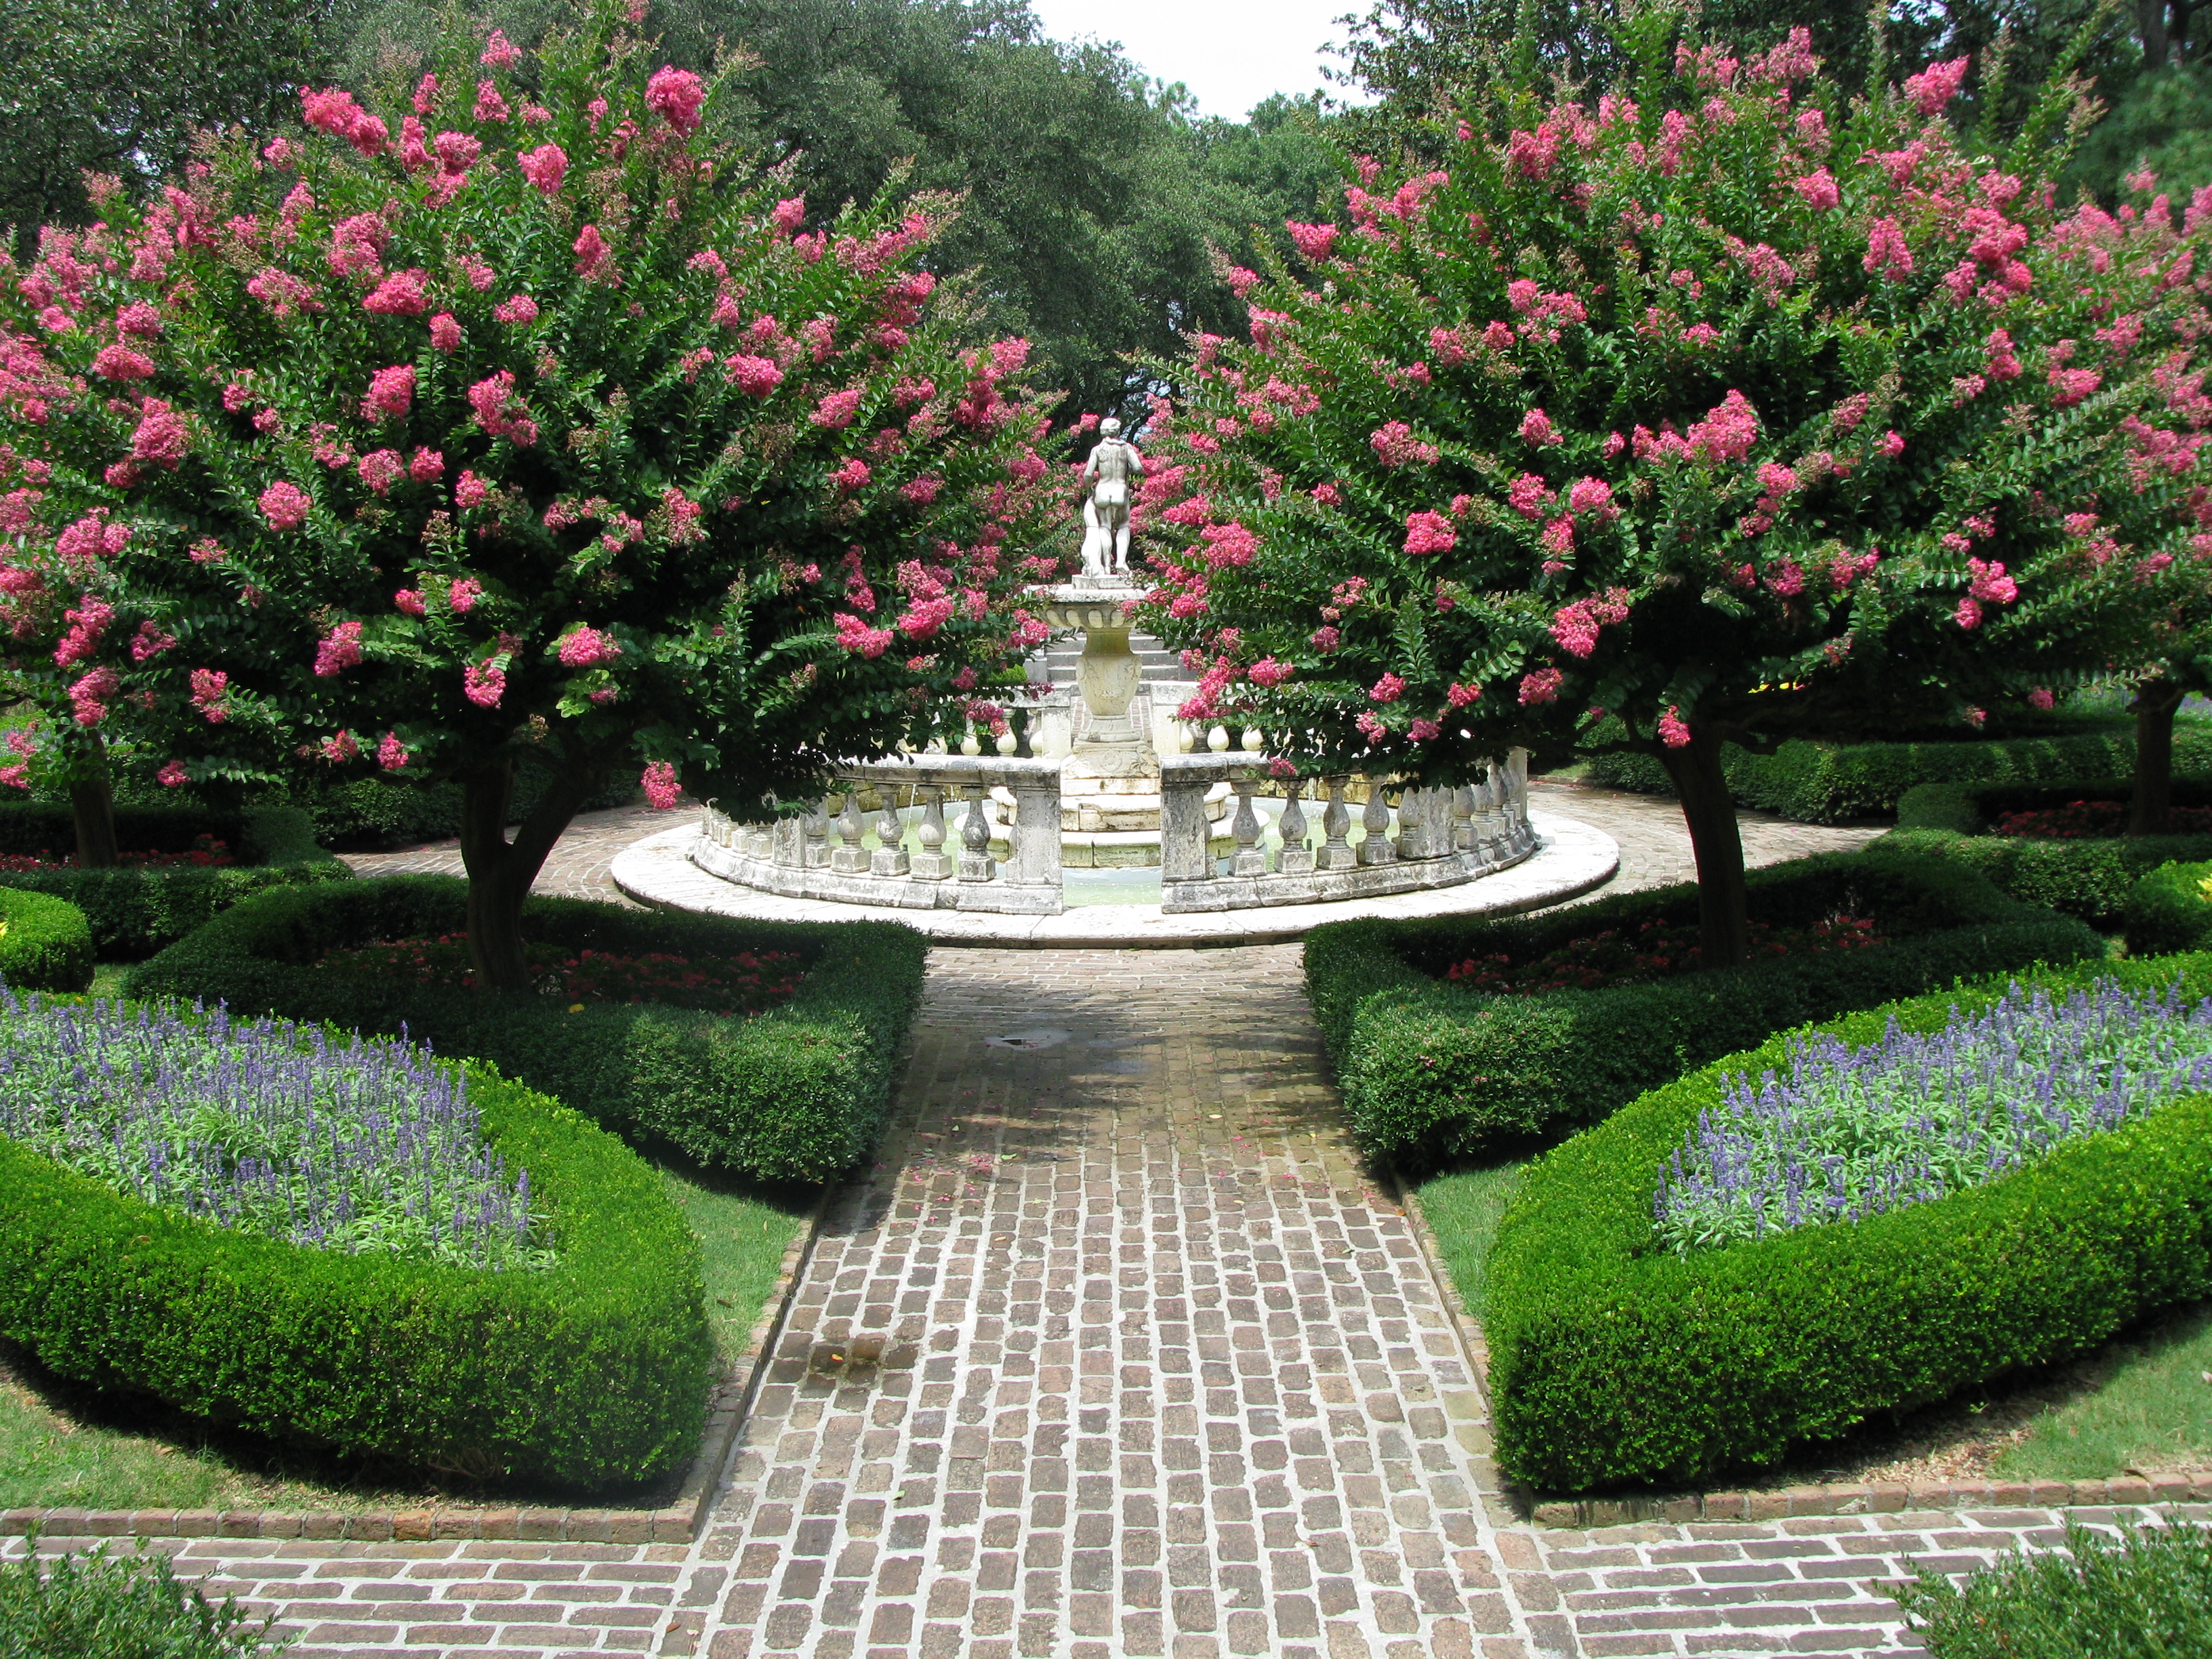
In today's frenetic lifestyle, where dual-income families have more money than free time, professional landscaping is no longer viewed as the high-brow luxury it once was.
Instead, many consumers dump the cost of services rendered into the "quality of life" category when parceling out their budget. After all, how else are we to conserve our precious weekends and still keep up with the green thumb gurus next door?
"People just consider their leisure time to be so much more valuable than they use to," said Bonnie Van Fleet, spokeswoman for the Associated Landscape Contractors of America. "They are willing to outsource these kinds of things to have their free time to themselves."
Industry statistics reveal the average homeowner spent $2,630 on lawn care and landscaping services in 1998, the most recent year for which data are available. Tha t adds up to a $16 billion industry.
"Over the last five years, those Sprinkler System Installation Flower Mound numbers have been growing steadily," notes ANLA's Albizo. "With the economy performing so well, sales of new and existing homes have been pretty robust and it's very common when people go to sell http://ambler.temple.edu/events/ambler-campus-shofuso-japanese-house-and-garden-tour their home to do a little extra landscaping to improve the look of their place. Likewise, when people buy a new home they typically do a little fresh landscaping to make it their own."
If you'd like to hire a contractor, but don't have $2,600 to burn, don't despair.
Experts say there are lots of ways to beautify your lawn without breaking the bank.
Source: ANLA
Baby steps
You can start by soliciting your friends and neighbors for recommendations on local landscapers they have used themselves. It helps, too, if you can visit their homes for a first hand look at the work these companies do.
Next, do some price checking. Once you've narrowed your search to three or four companies, call them up to find out what they charge. Most companies provide on-site estimates for free, in hopes of landing your business.
When requesting price quotes, experts say, be as specific as you can. If you're dreaming of a gazebo with slate walkways to and from your home, now's the time to tell them. That way you'll reduce the chance of getting hit with hidden fees and you'll be better able to compare the fees of each contractor on an apples-to-apples basis.
Before you sign your name on any contract, however, the Associated Landscape C ontractors of America recommends you follow its tips for tracking down a reputable contractor.
Next, Albizo said you should ask the landscape designer you've selected to map out a battle plan for your yard, including the exact placement of all trees, shrubs and plants. The contractor should tell you the name of plants and trees that will work best in your lawn, factoring in sunlight exposure, soil dryness and climate.
"You really have to know what you are doing and you have to have the time and energy for it, because you are liable to waste a lot of time and money making bad decisions," Albizo said. "Paying for a landscape plan is a very wise investment and it'll give you a starting point that you can use to install the plants yourself over the course of a few years. That way it's not such a large up-front payment."
Most landscaping firms, he said, charge between $100 and $200 for such a plan.
One other suggestion: Van Fleet said consumers should sit down and do some brainstorming on their own before the contractor visits their home.
Source: ANLA
"It sometimes works best to do your own research and come up with a wish list of what you'd like to have," she said. "That way you can sit down and talk with a professional about what part of the plan you can install yourself, like planting bulbs."
A wise investment
No matter how you go about it, experts agree the bottom line is any money you spend on landscaping care will pay off in the end.
According to estimates, a nicely landscaped lawn can increase the value of your home by 15 percent, allowing owners to recoup 100 percent to 200 percent of their investment.
Moreover, they say, if you're putting your home on the market it's an absolute m ust.
Real estate agents estimate 95 percent of home shoppers will not even get out of their car if the house for sale lacks "curb appeal" - including a well-groomed lawn.
"When you remodel your bathroom or kitchen, studies show you never recoup 100 percent of your investment," Van Fleet said. "But if you spend $2,000 on landscaping, you'll be able to earn back between $2,000 and $4,000 come resale time. The price of your property can actually go up in value."
SACRAMENTO Calif. It was still dark on Kokomo Drive in Sacramento's Natomas district as Paul Brown edged his city-issued Honda Civic past a row of beige stucco houses with tiny front lawns, looking for water wasters.
He heard the scofflaws before he saw their lush green lawns amid the otherwise parched turf. The buzz of a sprinkler system gave them away on a day that the city, desperate to save water amid California's ongoing drought, had forbidden watering.
"If I can get a good picture - if there's a lot of water - I'll cite them," he said.
California is in https://www.youtube.com/watch?v=5UqSm2OQEnw the third year of a devastating drought that has led farmers to fallow nearly half a million acres of cropland, threatened fish hatcheries and shrunk drinking water supplies for some communities.
To get people to conserve, many municipalities and regional water agencies have hired "water cops" like Brown to enforce state conservation rules.
Cities have even asked people to turn their neighbors in, and some have created smartphone apps to make the process easier.
Brown, 46, a father of four who was hired by the city as a meter reader, said he picked this area because he has fielded numerous complaints from neighbors about water wasters.
Camera and c itation book in hand, he parked the car a few houses down and got out, walking swiftly to the house where the sprinklers were on. A flash illuminated the building's facade, then all was dark again.
Brown headed back to the car and wrote up the citation. A check of his laptop showed that the residents had not been cited before, so instead of a fine of up to $500, they would get a warning. On a second offense, they would have to attend a meeting on how to save water. Third time, a fine.
The city of Sacramento has about a half-dozen employees enforcing conservation rules. Like Brown, they go out on Friday mornings before dawn, patrolling neighborhoods. When they're not patrolling, they field phone calls from residents turning in their neighbors, hopping in their cars to check out serious reports on the spot.
Water use in the city dropped 25 percent in August over the same month in 2013, the most recent month for which information is available, state data showed.
Statewide, residents and businesses cut water use by 11.5 percent in August over the comparable 2013 period, enough to fill nearly 40,000 Olympic-size swimming pools.
Felicia Marcus, chairwoman of the State Water Resources Control Board, credits new rules and tougher enforcement with much of the change.
"Regulations make better results than voluntary exhortations," she said. "People want to know that everybody else is doing it."
In August, the water resources board implemented statewide rules http://www.diynetwork.com/how-to/outdoors/landscaping that prohibit watering gardens enough to cause visible runoff, hosing down driveways or asphalt, and operating non-recirculating fountains.
Regulators also allowed municipalities to set mandatory cutbacks and levy fines against those who do not comply.
In Los Angeles, the city has received 4,400 reports of water wasters this year, resu lting in 2,200 warning citations, said Michelle Vargas, a spokeswoman with the Los Angeles Department of Water and Power.
L.A. has kept one water cop on the beat full-time since the state's last big drought in 2009, but it added three more this summer after the new statewide regulations went into https://www.youtube.com/watch?v=5UqSm2OQEnw effect.
The Southern California city of Long Beach is offering residents a water-waster app for their smartphones, making snitching quick and easy by allowing users to report neighbors and businesses for hosing down sidewalks, watering during the heat of the day or having a break or leak in their water lines.
Sometimes, Brown says, reports from vindictive neighbors lead him to visit a property only to find that no violation has taken place.
"I tell them I'm not going to cite you just because they call on you," said Brown, who carefully documents every case with p hotographs and a brief report. "There has to be evidence."
A new bill proposed in California would require all produceirrigated withfracking wastewaterto come withwarning labels.
The bill, which Assemblyman Mike Gatto (D)introduced on Monday, would require any crops grown with water that had previously been injected into rock formations to free oil and gas reserves and sold to consumers in the state to be labeled. The warning would read, "Produced using recycled or treated oil-field https://www.energy.gov/public-services/homes/landscaping wastewater."
"Consumers have a basic right to make informed decisions when it comes to the type of food that ends up on the family dinner table," Gatto said in a press release from his office. "Labeling food that has been irrigated with potentially harmful or carcinogenic chemicals, such as those in recycled fracking water, is the right thing to do."
Federal officials, environmentalists and the petroleum industry rem ain intensely divided on how safe fracking, or hydraulic fracturing, is. Debates over fracking largely revolve around whether the practice contaminates nearby groundwater, but an increase in farmers hydrating their crops with treated, previously injected water purchased from oil companies has aroused new concern.
Areport released last month by the California Council on Science and Technology did not discover strong evidence of dangerous chemicals in the recycled water -- but it also found that state regulators did not have an adequate testing process and that there was"not any control in place to prevent [contamination] from happening."
It's a risk Gatto believes people should be informed of.
"No one expects their lettuce to contain heavy chemicals from fracking wastewater," he said. "Studies show a high possibility that recycled oil-field wastewater may still contain dangerous chemicals, even after treatment."
Least Environmental Senators
Least En vironmental Senators
2012 LCV Scorecard: Lowest Scores In The Senate
The following 17 senators all scored under 10 in the League of Conservation Voters' 2012 National Environmental Scorecard.
The senators' scores are based on 14 votes on bills related to offshore drilling, Gulf restoration, oil subsidies, power plant Sprinkler Installation Denton air Sprinkler System Installation pollution and other environmental topics.
While over a dozen senators received fewer than 10 points, 37 senators received over 90 points on LCV's 100-point scale.
SEATTLE - Small but disorderly protests around the country Saturday raised the worry that extremist interpretations of Islamic law somehow might swell across the U.S. and infect American democracy, but many of the rallies drew even more over-the-top counter-protests by demonstrators who called such fears an unfounded distortion of Islam.
Hundreds of counter-protesters marched through downtown Seattle, banging drums, cymbals and cowbells behind a large sign saying "Seattle stands with our Muslim neighbors." Participants chanted "No hate, no fear, Muslims are welcome here" on their way to City Hall, where dozens of anti-Shariah protesters rallied.
A phalanx of bicycle police officers kept the sides separated during the sanctioned events, but authorities said a large fight broke out after the gatherings concluded.Seattle police used tear gas to disperse rowdy demonstratorsand made several arrests following an anti-Shariah rally and a much larger counter-protest. The department said it was still reviewing how many people http://www.uscourts.gov/forms/attorney-forms were arrested and what charges they might face, but at least some were expected to be booked for investigation of assault.
In front of the Trump building in downtown Chicago, about 30 people demonstrated against Islamic law and in favor of President Donald Trump, shouting slogans and holding signs that read "Ban Sharia" and "Sharia abuses women." About twice as many counter-protesters marshaled across the street.
A similar scene played out in a park near a New York courthouse, where counter-protesters sounded air-horns and banged pots and pans in an effort to silence an anti-Shariah rally. In St. Paul, Minnesota, state troopers arrested about seven people when scuffles broke out at the close of competing demonstrations at the state Capitol.
"The theme of today is drowning out racism," said New York counter-protester Tony Murphy, standing next to demonstrators with colorful earplugs. "The more racists get a platform, the more people get attacked."
The rallies, held in more than two dozen U.S. cities, were organized by https://www.youtube.com/watch?v=tx5hfLp3Vqc ACT for America, which claims Islamic law is incompatible with Western democracy.
The organization said it opposes discrimination and supports the rights of those subject to Shariah. However, the Southern Poverty Law Center, which tracks hate groups, calls it the largest American anti-Muslim group.
"I don't believe Islam can peacefully co-exist with the Constitution," said Seattle anti-Shariah demonstrator Aaron Bassford, 29. "We need unity in this country under no ideology and no banner except the Constitution of the United States of America."
But the overwhelming majority of Muslims don't want to replace U.S. law with Islamic law, known as Shariah, and only "radical extremist groups" would call for that, said Liyakat Takim, a professor of Islamic studies at McMaster University in the Canadian city of Hamilton, Ontario.
Shariah, Takim said, refers to guidelines or principles -- how Muslims should live. "Fiqh" refers to jurisprudence, or specific laws. The values embedded in Shariah do not change and are shared among Muslims, he said, while fiqh is open to interpretation and change, and in fact differs among Islamic sects and communities.
"The Quran allows slavery. So does the Old Testament. That doesn't mean we allow it today, too," Takim said. "Laws are amenable to change."
In Seattle, activists set up an "Ask an American Muslim" booth to give rally participants on either side a chance to speak with a Muslim.
"American Muslims support the American values and freedoms we all cherish," said Arsalan Bukhari, executive director of the state chapter of the Council on American-Islamic Relations.
The marches come amid a rise in reports of anti-Muslim incidents in the U.S., including arson attacks and vandalism at mosques, harassment of women wearing Muslim head coverings and bullying of Muslim schoolchildren.
In California, small but raucous demonstrations were held in a handful of cities, including San Bernardino, where a husband and wife inspired by the Islamic State group killed 14 people and wounded 22 in a 2015 shooting attack.
Clusters of pro testers and counter-protesters gathered on four corners of an intersection at a memorial to the slain, yelling and waving American flags and posters proclaiming various causes. Anti-Islamic law demonstrators marched past the building where the shootings occurred.
"There's an anti-Trump, a pro-Trump, anti-extremists, so there are a variety of messages here," San Bernardino police spokeswoman Eileen Hards said. "There are so many messages going on that I'm not sure who's who."
"We're anti-Shariah. We're anti-radicals," the Upland woman said. She added, of Shariah: "It's coming in very slowly, and a lot of the refugees are bringing that ideology here. All of it is just barbaric."
About 300 people attended San Bernardino's rallies. Three were arrest ed on suspicion of vandalism for smashing windows of two cars, Hards said.
___
Associated Press writers Andrew Selsky in Portland, Oregon; Deniz Cam in New York; Jeff Karoub in Detroit; Kimberlee Kruesi in Boise, Idaho; Robert Jablon in Los Angeles; Dave Kolpack in Fargo, North Dakota; and Michael Tarm in Chicago contributed to this report.
Ralph Waldo Emerson once said earth laughs in flower. If that is the case, Singapore is full of laughter.
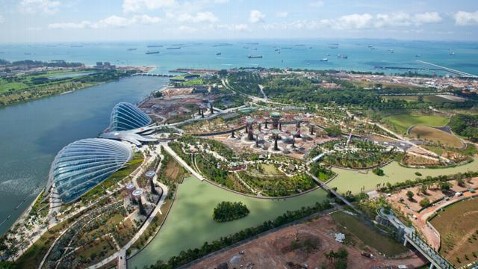
Gardens by the Bay, set in Singapore's Marina Bay downtown area, has been open less than a month, but it's already changing the face of the country. The project, which cost $810 million to build, covers the space of 177 football fields and houses 80 percent of the world's plant species - this is not your mother's garden.
Singapore Prime Minister Lee Hsien Loong calls the new garden project "an icon of Marina Bay" and "the latest manifestation of Singapore's Garden City vision."
For the 70,000 people who visited the garden within the first two days of its opening it was a sight to be seen.
More Photos of Singapore's Gardens by the Bay
Visitors take in awe-inspiring views, including the world's tallest cooled conservatories, housing some of the most endangered habitats and plants in the world, and a grove of 18 gigantic solar-power, man-made "supertrees" ranging https://www.sprinklr.com/ in height from 25 to 50 meters, all designed to collect rainwater.
"The idea and feel for the supertrees was in part inspired by the 'Valley of the Giants' in southwest Australia," said Andrew Grant, CEO of Grant Associates, the firm that won an international competition to build the project.
"I had visited these amazing trees when I went to see my brother who lives near Perth," he told ABC News. "The striking experience of changing from the normal eucalyptus forest into the super tall worlds of the Karri trees, along with the experience of the elevated walkway was very inspiring. We merged this physical reference with the magical experience of the forest seen in the Studio Ghibli film 'Princess Mononoko' to create the character and sc ale of the supertree grove."
The project is a futuristic take on nature and as well an awe-inspiring vision for the future of a city.
Gardens by the Bay is also a marvel of sustainable energy and water usage. An underground biomass boiler system that runs on tree and grass clippings and organic waste has been installed. The boiler system, along with onsite solar-photovoltaics, generate energy to cool the garden's two conservatory domes. Water collection from the supertrees acts as another imaginative irrigation source.
"We hope that this project does convey something to the wider world about the importance of beauty and wonder in our parks and gardens, as well as the potential for imaginative integrated thinking to deliver a more stimulating and environmentally sustainable future," Grant told ABC News. The Garden Nation
But Garden's by the Bay is just the tip of the iceberg for Singapore's green vision.
The 272-square-mile city-state has undergone an economic miracle in the last half a century: From 1960 to 2010; the city-state's GDP increased 41-fold, as it became the world's fourth-largest financial center. In the midst of reshaping the economy, the city-state created another miracle by managing to remain a garden nation.
Singapore's green efforts began in 1963 when then Prime Minister Lee Kuan Yew initiated a tree-planting campaign that added 1.5 million trees. As a result, Singapore - even though highly urbanized - looks more like a garden than a concrete jungle.
Leading the Way in Environmental Planning
Today, the city is still trying to reinvent the country of 5.2 million as "a city within a garden."
"Sustainable development is a journey, not a destination," Cheng Hsing Yao, deputy executive director of the Center for Livable Cities in Singapore told ABC News. "No matter how developed you are, there will always be new challenges."
All around the nation you can see little signs of gardener's care. Plantings have been installed to soften the look of cement retaining walls, and various green areas throughout the island have been interconnecting with overhead pedestrian bridges.
The government is going out of its way to ensure the city remains a place where plants and parks live in harmony with the city.
"Gardens by the Bay is one of a number of groundbreaking landscape projects that are shaping the identity of Singapore as a C ity in a Garden," Grant Sprinkler System Installation Mckinney said. "Others include the Bishan Park, Tampines Eco Park and the round island green corridor. A common thread within these projects is the desire to create attractive Sprinkler Installation and functional outdoor space for the people of Singapore where the cultural and ecological benefits of plants and habitats are emphasized."
In what he calls the strangest story of his career, correspondent Steve Hartman meets up https://www.amazon.com/ Lawn-Garden-Sprinklers/b?ie=UTF8&node=553974 with an old colleague, veteran investigative reporter Brad Sprinklers Brown, who had a bizarre tale to tell, involving Brown's mother, Janet, and the apparent message that showed up on his iPhone three days after she died